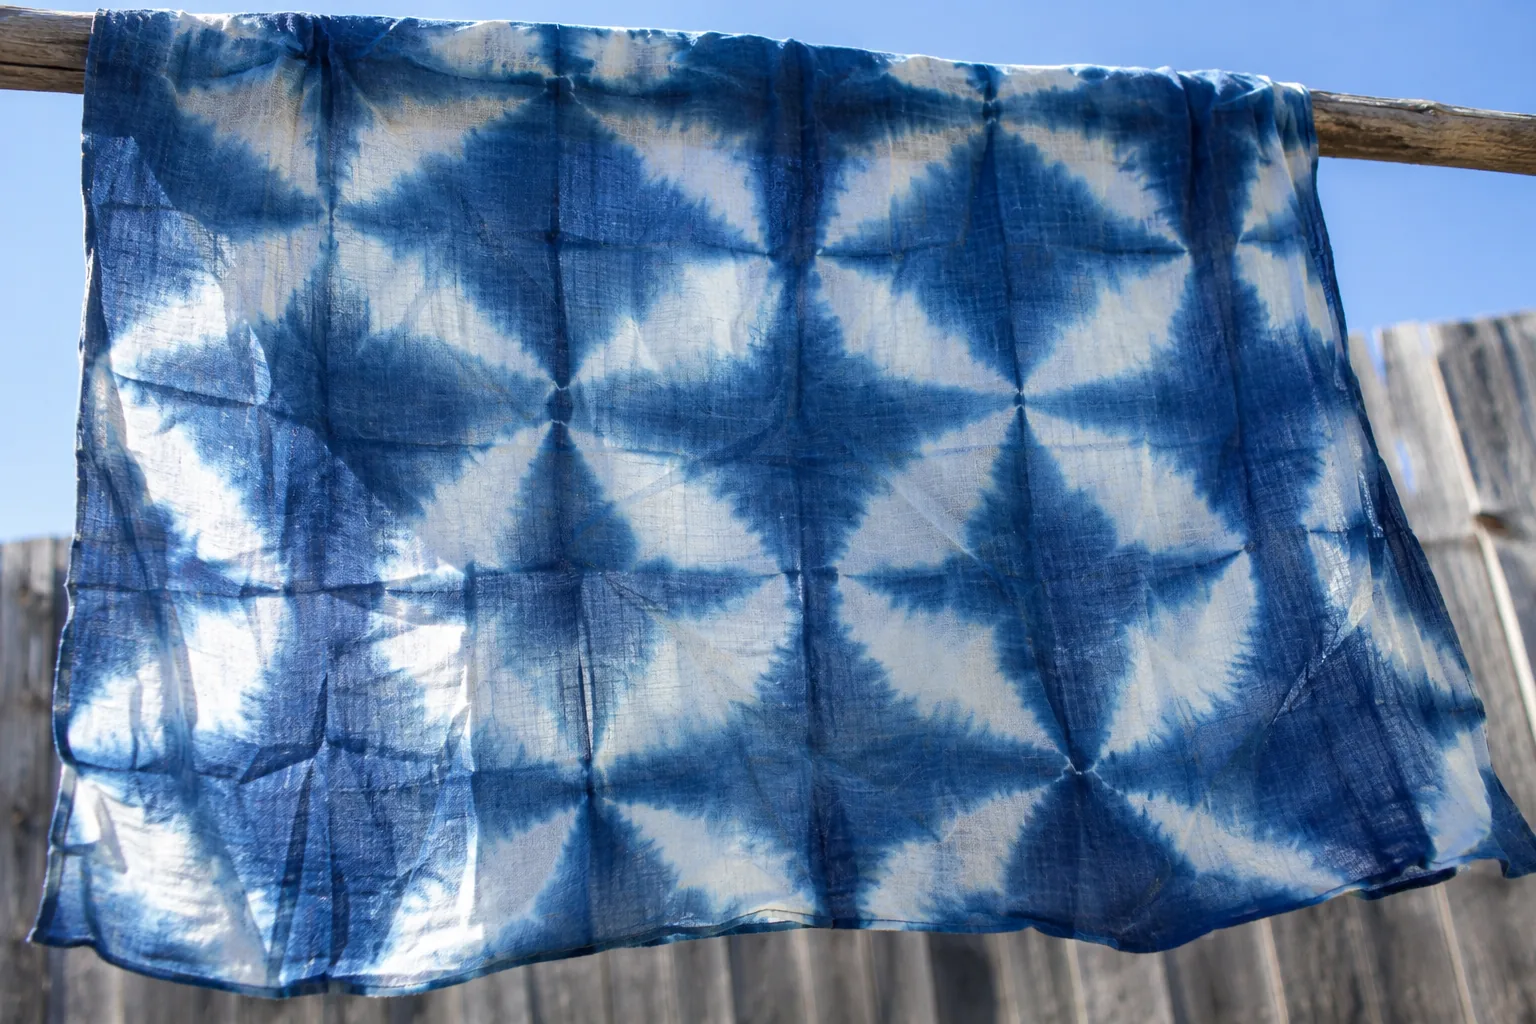
Shibori is a family of resist methods
According to KOGEI JAPAN, Arimatsu-Narumi shibori is made around Nagoya in Aichi Prefecture, is designated a national traditional craft, and has more than 100 techniques. Its beginnings date to the early 1600s. A short list of shibori folding techniques introduces only part of that wider craft.
The Arimatsu-Narumi Tie-Dyeing Museum’s ARIMATSU TEXTILE page describes binding, sewing, and clamping, with artisans generally specializing in a single technique. World Shibori Network groups Arimatsu methods into hand-knotting, stitching, pleating, and fold-and-clamp work. The exercises here borrow shapes that can be explored at home; they do not reproduce an artisan’s expertise.
Compare five shibori techniques for beginners
Choose by the shape you want and what will hold the cloth. The pattern descriptions follow the museum and Kuno Senkojo accounts below; the first-project suggestions are editorial home exercises.
| Method | What resists the dye | Pattern it gives | What you need | Good first project |
|---|---|---|---|---|
| Itajime — board clamping; includes sekka | Boards pressing folded layers | Geometric spaces; sekka flower shapes | Matching blocks and a clamp or binding | A folded cloth sample |
| Arashi — storm | Pole, thread, and compressed folds | Fine diagonal rain-like lines | A tube and wrapping thread | A pole-wrapped sample |
| Kumo — spider | Thread around gathered pleats | Radiating spiderweb shapes | Binding thread | An isolated gathered motif |
| Nui — stitching; mokume means wood grain | Stitches pulled into gathers | Irregular wood-grain lines | Needle and suitable strong thread | A sample of stitched lines |
| Kanoko-style dots — fawn-spot inspired | Small bound pinches | Small ring-like dots | Binding thread | Separated pinches on a sample |
Itajime: fold and clamp
How artisans in Arimatsu do it
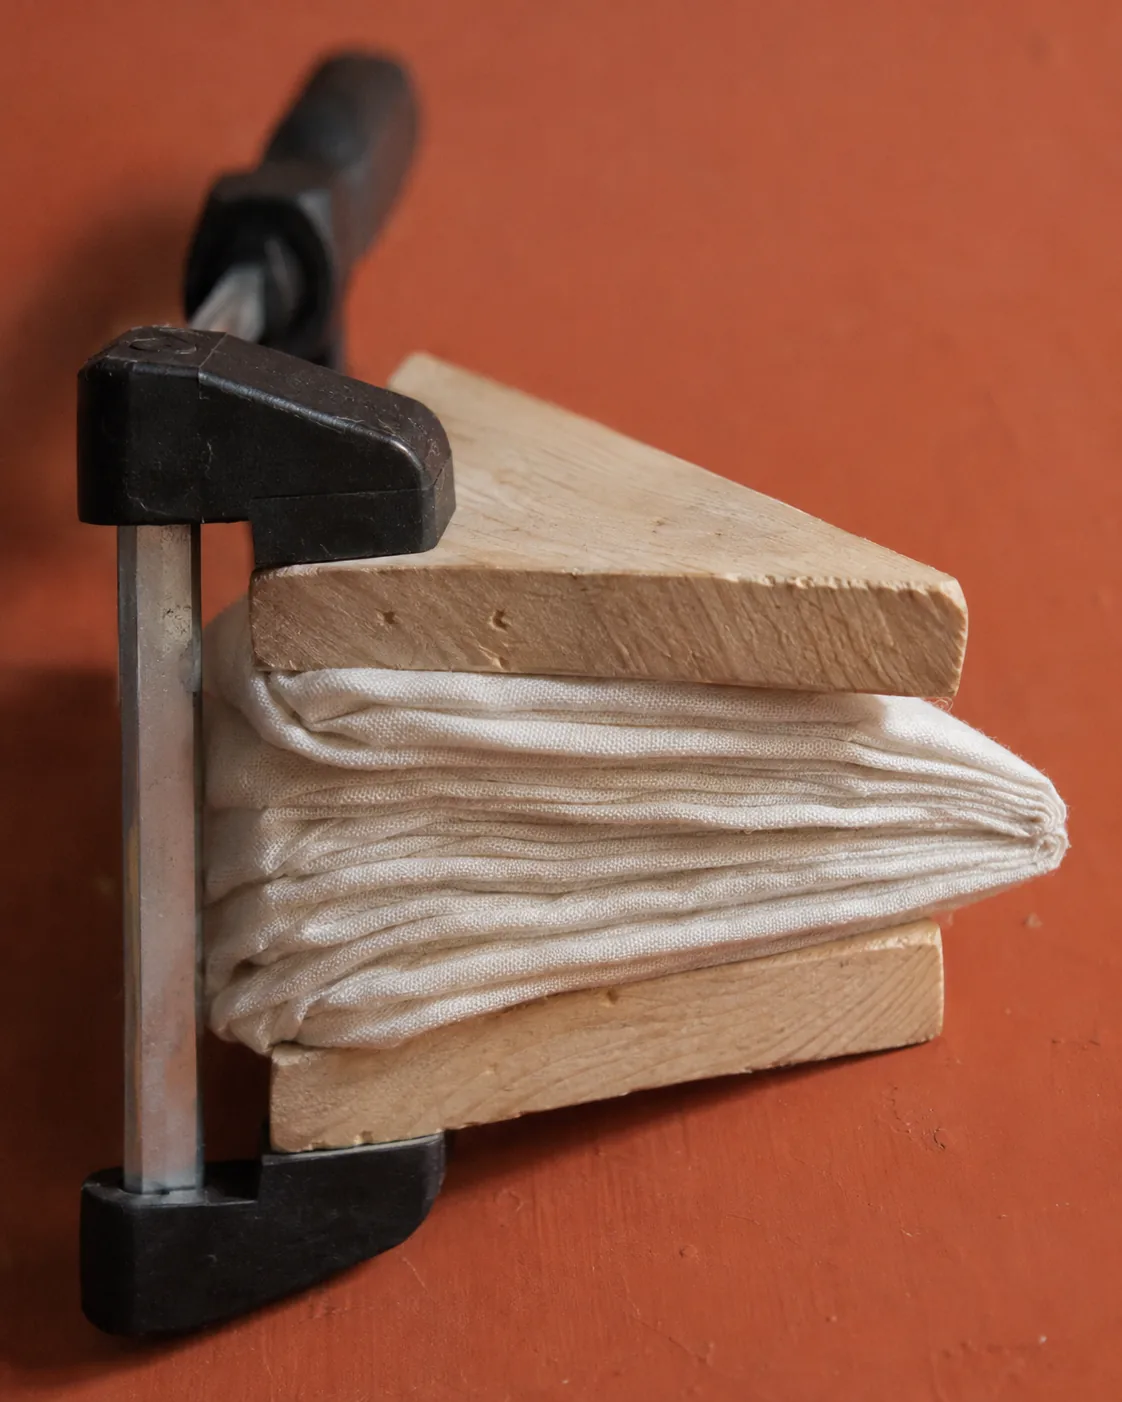
Kuno Senkojo, a shibori dye works in Arimatsu, describes itajime sekka as folded cloth sandwiched between boards and immersed in dye. KOGEI JAPAN describes sekka as a flower pattern. Begin here if comparing a board shape with exposed cloth helps you plan.
AI-generated editorial illustration; not a product photograph.
A simple way to try the shape at home
- Accordion-fold the cloth back and forth, keeping folds even and suited to the width of your blocks.
- Fold the strip into a triangular packet for a sekka-inspired shape, or choose a square packet.
- Place matching boards against the broad faces and secure them evenly, leaving folded edges and corners exposed.
- Dye the secured packet according to your kit’s instructions, keeping the arrangement in place as directed.
The exposed folds and corners let dye enter, while the compressed faces are intended to stay white. Don’t expect a perfectly even repeat on a first try.
Arashi: wrap and compress
How artisans in Arimatsu do it
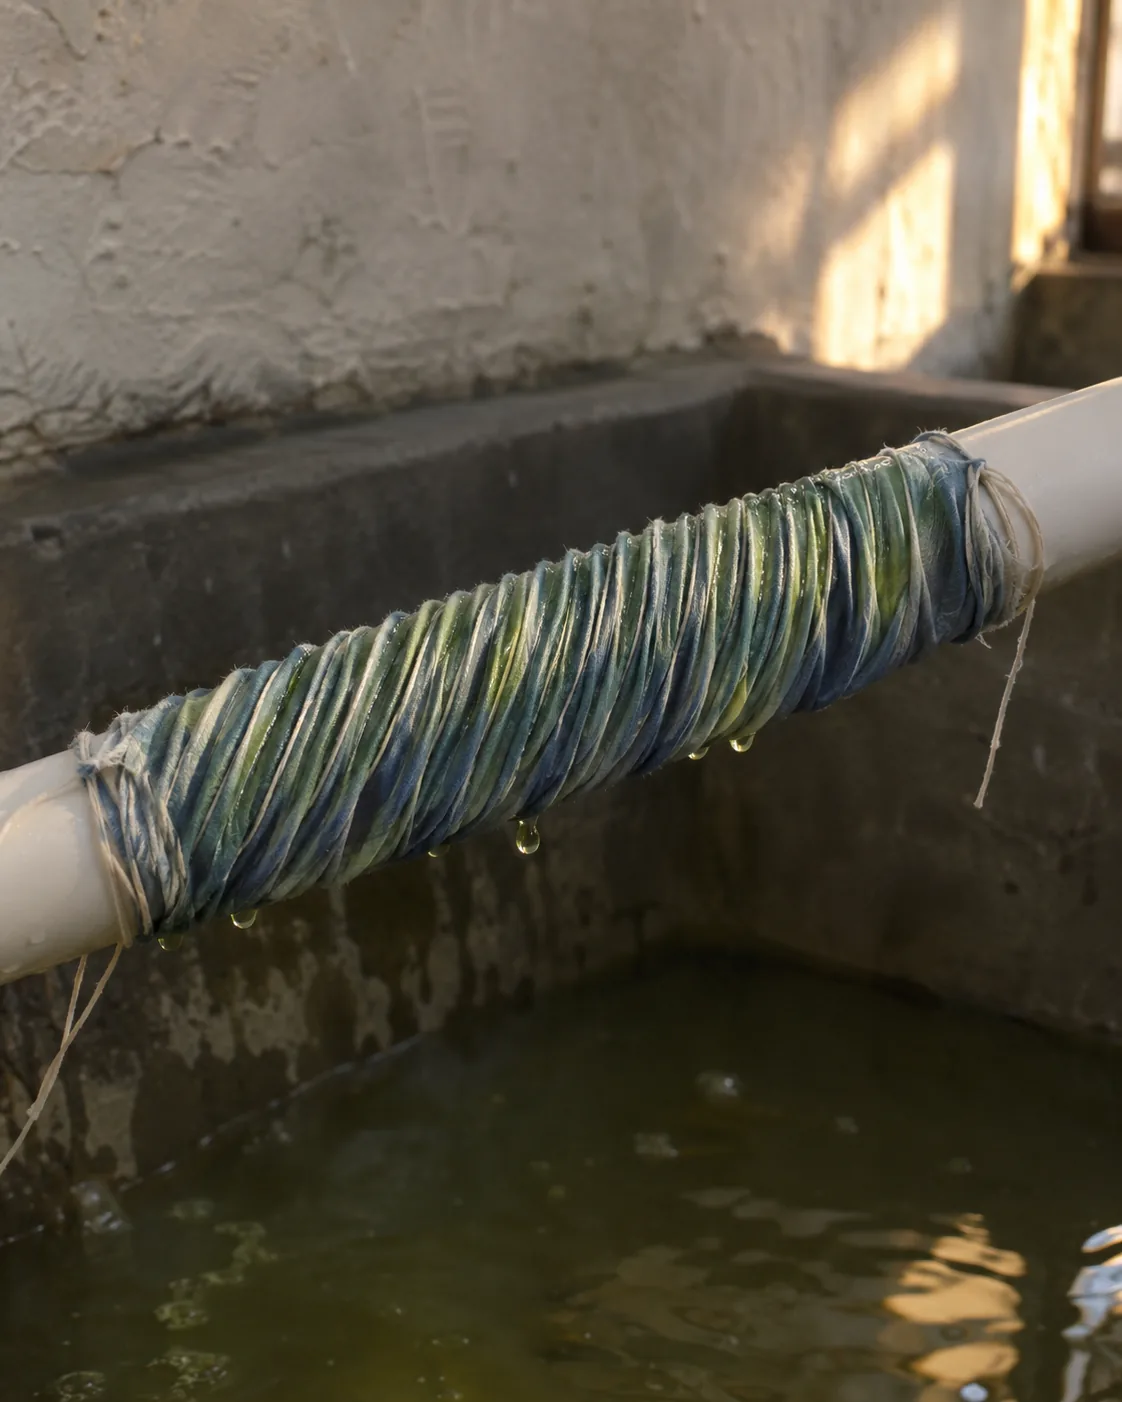
Kuno Senkojo describes arashi as fine diagonal patterns resembling rain in a storm. Traditionally, the cloth is wrapped around a pole. For a home exercise, use a tube such as a plastic pipe as the support, as a substitute for that traditional pole.
AI-generated editorial illustration; not a product photograph.
A simple way to try the shape at home
- Arrange the cloth diagonally and wrap it in a spiral around the tube.
- Wrap thread over the cloth, keeping the wrapping reasonably even.
- Push the wrapped cloth along the tube into close ridges, keeping the thread secure.
- Follow your kit’s dyeing instructions with the wrapped shape held in place.
Before dyeing, check that the spiral runs at a steady angle and the ridges are packed closely together.
Kumo: gather a radiating shape
How artisans in Arimatsu do it
The Arimatsu-Narumi Tie-Dyeing Museum describes te-kumo artisans hooking cloth, forming pleats like umbrella ribs with their fingertips, and winding thread upward from the base. Kuno Senkojo describes a radiating spiderweb motif. This exercise simplifies the gathering rather than presenting it as the artisan method.
A simple way to try the shape at home
- Pinch and lift an area of cloth, letting surrounding fabric gather toward it.
- Arrange the gathered cloth into radiating pleats as evenly as you can.
- Wind thread upward from the base around the gathered shape and secure it.
- Keep the binding in place and follow your kit’s dyeing instructions.
Concentrate on an isolated motif before planning a whole field of them. Compare the direction of its pleats with the spiderweb description without expecting the precision of hooked artisan work.
Nui: stitch a mokume-inspired sample
How artisans in Arimatsu do it
The Arimatsu-Narumi Tie-Dyeing Museum describes mokume nui as running stitches along evenly spaced lines, pulled tight to create irregular wrinkles resembling wood grain. Stitching lets you plan lines, although laying them out asks for more patience than folding a packet.
A simple way to try the shape at home
- Plan lines across the cloth, keeping their spacing reasonably even.
- Work running stitches along the lines with a needle and suitable strong thread.
- Pull the thread to gather the fabric firmly along each path, then secure it.
- Follow your kit’s dyeing instructions while keeping the gathers tied.
Irregular wrinkles are part of the museum’s description. Treat your paths as a starting arrangement rather than expecting each stitch to print a perfectly straight mark.
Kanoko-style dots: try small bound pinches
How artisans in Arimatsu do it
Kuno Senkojo describes kanoko as small pinched bindings whose pattern resembles a fawn’s spots. Fine artisan kanoko uses specialized stands and hooks; miura is another artisan technique using such equipment. Treat this exercise as a simple nod to kanoko, not an easy version of it.
A simple way to try the shape at home
- Choose separated places for small pinches, leaving space between them.
- Lift a small pinch and wrap thread snugly around its base.
- Secure the binding and repeat the gesture where you want another dot.
- Keep the pinches bound and follow your kit’s dyeing instructions.
Think of these as kanoko-style ring dots. Explore small bindings without claiming the fine, closely worked finish of artisan kanoko.
Why the inside of a fold stays pale
In these shibori folding techniques, overlapping cloth makes inner layers harder for dye to reach. Firmer compression leaves more protected white areas. That general resist principle connects a clamped face, a bound pinch, and a tightly gathered stitched line.
For vat preparation, follow your kit’s instructions and read our aizome and shibori beginner guide for how indigo works, cloth choice, and safety. Wear gloves, cover the work area, keep dye and tools away from children and pets, and follow the kit label.
Taking the binding off
The Arimatsu-Narumi Tie-Dyeing Museum cautions that tightly secured thread must be removed carefully to avoid damaging cloth. Follow your kit’s process before unbinding, then ease the thread away slowly. Pay attention to the fabric beneath the binding instead of pulling at a stubborn knot.
What to buy for each method
For itajime, match the packet to suitable boards. Check the Graham Keegan kit listing for supplied boards and other contents, and consider the woodworking bar clamps if you prefer clamping to tying. Confirm the fit before buying.
Arashi needs a supporting tube; consider something you already have. Kumo and kanoko-style dots need binding thread. The Wavwavw listing describes waxed thread and a puller; for nui, you will also need a needle that suits the thread.
The Honey Oak listing describes an alternative indigo kit. Choose by its instructions and contents. For further learning, consider the Shibori paperback, especially if artisan kanoko or miura interests you.
Quick answers before you fold
What are the main shibori folding techniques?
This guide covers five: itajime (fold and clamp, including sekka), arashi (pole wrapping), kumo (gathered and bound), nui (stitched), and kanoko-style dots. World Shibori Network groups Arimatsu methods into hand-knotting, stitching, pleating, and fold-and-clamp work, and places sekka and itajime in the fold-and-clamp group.
Which shibori technique is easiest for beginners?
Our starting suggestion is itajime because you can compare the packet directly with the boards protecting it. Kuno Senkojo describes this folded-and-sandwiched arrangement for itajime sekka; the beginner recommendation is an editorial suggestion rather than a source ranking.
What is the difference between itajime and arashi?
Kuno Senkojo describes itajime sekka as folded cloth held between boards, while arashi has fine diagonal patterns like storm rain. The home exercises use boards for the former and a wrapped, thread-bound tube for the latter.
Do I need special tools for shibori?
The museum describes specialized handwork, including a hook for te-kumo. For the simplified shapes here, choose boards and a clamp, a tube and thread, or a needle and suitable thread according to the method. Those substitutes do not make fine artisan kanoko or miura an easy home technique.
What to read next
Use the aizome and shibori beginner guide for indigo preparation, cloth choices, and safety. For another textile project, read sashiko visible mending for indigo denim.
Sources & method
Primary references
- KOGEI JAPAN — Arimatsu Narumi Tie-Dyeing (English): Regional context, early history, craft designation, and technique examples.
- Arimatsu-Narumi Tie-Dyeing Museum — About Arimatsu shibori (Japanese): Te-kumo, mokume stitching, and careful thread removal.
- Arimatsu-Narumi Tie-Dyeing Museum — ARIMATSU TEXTILE (Japanese with English): More than 100 techniques and artisan specialization.
- Kuno Senkojo — Textile examples (Japanese): Itajime sekka, arashi, kanoko, and te-kumo patterns.
- World Shibori Network — Arimatsu-Narumi workshops (English): Hand-knotting, stitching, pleating, and fold-and-clamp categories.
Listing details were checked on Amazon on November 20, 2026. No products were tested for this article. Home exercises and first-project suggestions are editorial adaptations; attributed craft descriptions come from the references above.
Affiliate disclosure: As an Amazon Associate I earn from qualifying purchases.